
Owning a personal photography studio must have been on your bucket-list but you possibly postponed it due to expenses involved. We can tell you it is not out of your reach. If you are dreaming of setting up a bootstrapped studio at home or even a factory, you just need little but right investments.
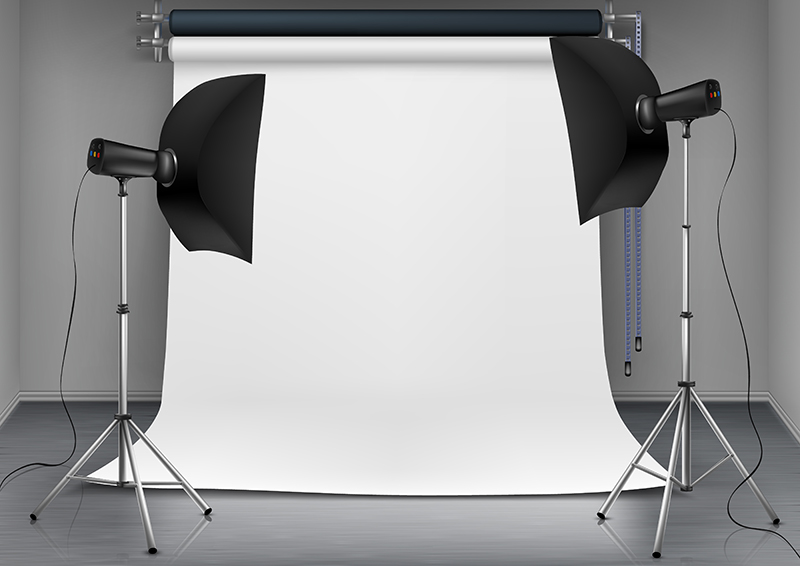
We are not talking about the technical lights and reflectors that you usually see in professional set-ups. We promised to help you create a budget-friendly photo studio in your space, so here we begin with a list of basic equipment that you essentially need, common to all kinds of product photography.
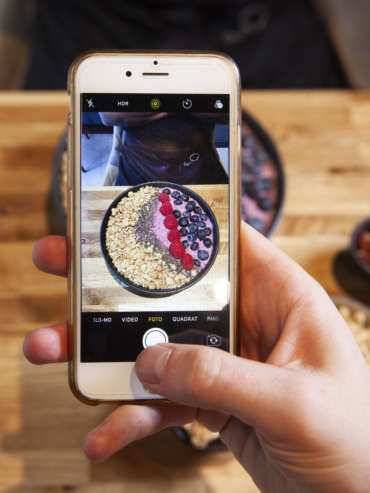
The first obvious thing for taking photographs is having a great camera. By great, we don’t mean the most expensive one. The camera installed at the back of your smartphone is just enough to capture your products in all its glory. With features like “Grids” to create better focus on your subject and adjustments like ISO, white balance and contrast to name a few, you can achieve a good-quality image in seconds. You can always go for the fancy DSLRs but all you really need is a high-number megapixel (> 12 megapixel) camera that can achieve excellent results without spending a fortune.
If you are still willing to get the best of the lot, here is a list of smartphones boasting the best cameras out there.
The one thing that can really affect a photograph is lighting. Ask the experts and they still prefer natural lighting while taking photographs. The reason is simple – natural light is easily attainable and there is so much you can do during editing stages any way. It creates a natural effect of composition and shadows, contrast and illumination that accentuates the beauty of your product. Another good thing about it is – you get it for free. Just having a generous window in your house can help you achieve great shots within no time. Placing your product near a big source of natural light is all the light that you require for a dramatic touch.
You need a backdrop for your product photography set up and investing in a white sheet roll is one good buy. White background is proven to be the best as it really brings out the natural colors of your product and doesn’t steal away the limelight. Going for a giant roll helps you achieve a flowy background that covers the frame completely and is not creased. Also, remember that the white paper board needs to be bigger than the product itself to prevent the paper sides from being visible in your photographs.
Give a read if you wish to know more about photography backdrops.
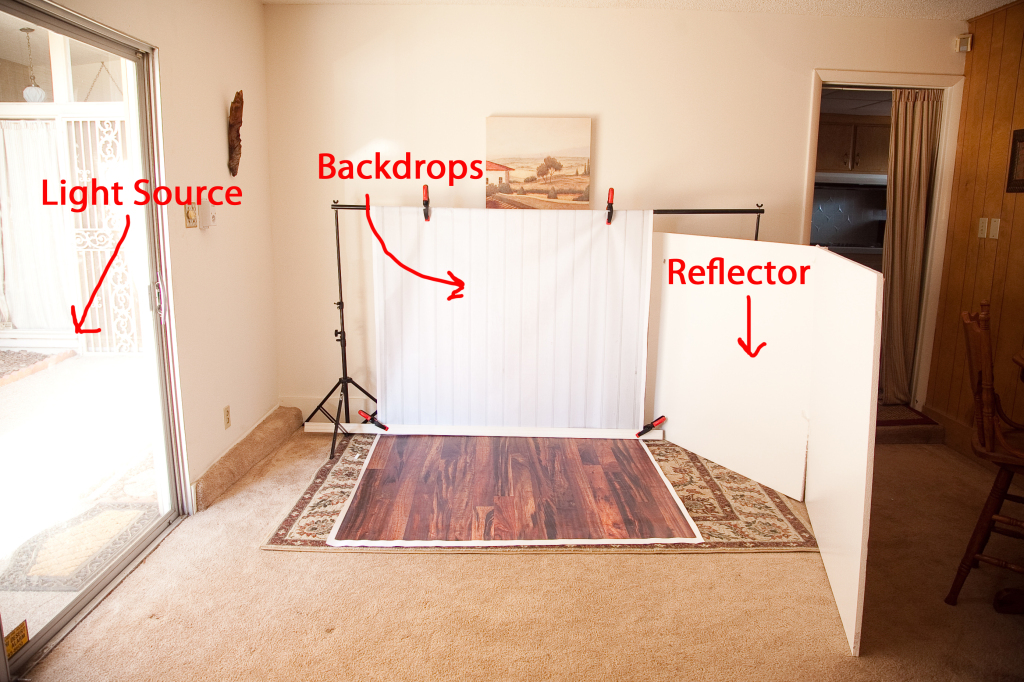
When working at home, you can’t go for hi-fi reflectors and all the gadgets found in a photographer’s bunker. But that doesn’t stop you from getting a great shot. Go for a cardboard foam or white foam-board and use it as a reflector. The right way to do it placing the product between the light source and the foamboard. The board bounces the light and eliminates harsh shadows, creating an evenly lit product photograph. It is handy and comes in various thicknesses to suit your needs.
Click here to build a DIY reflector that works just like a professional one.
Clamping pins, glues and duct tapes come in handy to keep the product background at place. This needs to be done to avoid any movement during photoshoot. You might also require masking tapes for holding reflectors in place or keeping the product in standing position. These are inevitable especially when you are working single handed while taking photographs.
A piece of furniture like a table or desktop found in your home or even a kitchen top is great for placing your product. One thing that you need to pay attention to is the right height. If your table is too high or too low, you may face difficulty in shooting multiple photographs. High chairs or stools can play a role in providing you different angles and perspectives while shooting.
The one thing that we dread the most while taking photographs is getting a blurred one. In order to completely shake it off, invest in a tripod to hold your camera in place. No more worrying about shaking fingers or distorted images, just clean, sharp and stable photographs every single time. Tripods allow you to maintain the exact same position and distance from the product, building a consistent look for all your images. Just place the tripod stand with your camera and move products as much as you require to take sharp images without hassle.
Here are some tripods under 50$ that you should check out.

Even when you think that the photograph is good and ready to be uploaded to your website, it still needs some adjustments to make it look absolutely terrific. You need an editing software like photoshop to hide all the flaws of your image and if you don’t have the time, you can always seek an image editing service company to save your time and effort. But don’t miss this crucial step because the customers measure your professionalism on the basis of your product photographs.
Assembled the required equipment? Here is how to set-up you home studio and take amazing, professional photographs that will instantly win over your buyer’s hearts and get your sales running.
Choose a good space (close to a 100 sq. ft. room) and begin by placing the furniture piece (table or a chair) right next to the window. Keep some distance between the table and the wall/window, you’ll need space to move around it. The window should be big enough to let in ample light and evenly brighten the product. Avoid the windows that get direct sunlight.
Take the white paper sweep or “roll” and unwind to create the backdrop of the set. The best way to do it is clamp or pin the white paper to a high table or a shelf or a wall to create a sweeping, curved look. Fix the paper well to avoid any movement during placing products or while shooting. If necessary, roll the sides and stick well and get rid of edges, keeping it steady and neat will save you ample of time and trouble later.
Time to place the hero of this assembly – your product. Brush and clean your product properly before bringing it onstage. Place your product in the centre of the table over the white sheet. Your product should be in a standing position, rendering a stiff look. For instance, if you are photographing shoes, remember to hold the laces upright with making tapes. While shooting garments, pin them properly with needles or blue tac to eliminate a sluggish effect. Be creative and take some time to style the products to make them look appealing and professionally photographed.
Place your reflector which is the white foam board just opposite to the light source to diffuse the shadows and for bouncing light. If you are doing the photoshoot alone, you may use a supporter at the back of the foamboard to set the frame and keep it in position. The reflector should be of appropriate size to scatter light and glorify product details.
Now that the product is ready, affix your phone into the tripod stand. Place it in front of the product, maintain a good distance and begin shooting. There are numerous options for a budget friendly tripod that will help achieve a beguiling image. Let the tripod do its part and snap from as many angles as you wish. Set a good frame once and keep repeating the same for all products uniformly with the camera clasped to tripod.
Now that you are aware of setting up a DIY photo studio at home with bare minimum, we would love to share some tips on making your product images flawless and irresistible.
With this newly acquired knowledge and a few items that you already possess, you can create your own photo studio at home at bootstrapped budget to generate gorgeous product photographs.
Ref:
https://doopic.com/en/blog-how-to-create-a-small-diy-photo-studio-on-a-budget/
https://www.smallrevolution.com/create-diy-photography-studio/