

Get eye-catching flat lay Photography with your Mobile Phone
Every picture tells a story and in the digital world, every picture tells a brand’s story. Flat lay style of product photography gives online brands the privilege to increase sales in minimal style without trying too hard.
With a smartphone hosting a great camera, you already have the right tool in your hand to create visual impact with awesome flat lay photographs.
What is Flat Lay Photography ?
If you are struggling with the term, Flat lay photography is the top shot of your product, without any angle. Basically, your product needs to be laid down (along with some other objects) on the floor or bed or coffee table or any other flat surface, that plays the backdrop of your picture. The image is then taken with a camera placed straight above it. We have all seen it in our social media feeds and have appreciated the great setup. But, as simple as it may sound, there’s more to it than meets the eye.
Flat Lay for Beginners
If you have just come across this great style of photography, then you are clearly missing out. Not too late though, here is how to make flat lays for beginners and even master the art in no time.
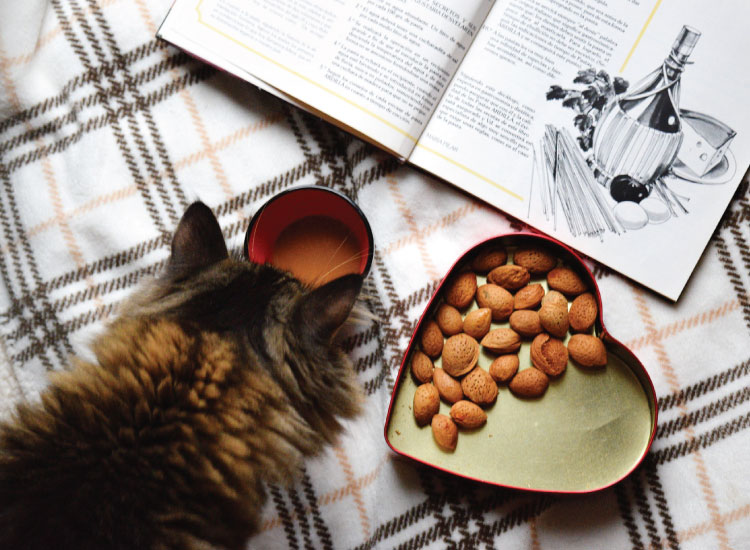
Flat lay photograph has all sorts of elements/props sprinkled in your frame, along with your main product. These elements can be anything ranging from a great coffee mug, books, attractive pens or even fresh flowers. So, observe and bring along the right props to be added alongside your main product to create a stunning frame.
The usual backdrop for flat lay photographs is a hard and white foam or a white board. White marble is also often employed as back surface. They help produce clean, crisp images without stealing the limelight of the product. Hard backdrops allow the products to spread over evenly, which can even be glued to the board for stable shots. Old boards or woody frames can also be used for desired effect.
The key quality of a flat lay photograph is artistic placement of the elements and the primary product to create an intriguing frame. Random arrangement or follow an order – remember to be creative and keep your main product as the focus of the frame. The aim is to create an aesthetically pleasing, mesmerising look without cluttering objects. Give you image a sense of depth by ensuring that every object is well lit – you need to be near a source of natural light (preferably beside a large open window).
Take the help of a high stool or if you are using floor as a backdrop, get on bed. The idea is to get your camera directly parallel and above the shooting frame to get a bird’s eye view. Hold steady, or call for the tripod with an arm attachment to keep your frame still and take your very first flat lay photograph with nothing more than your smartphone.
Your flat lay may not still look perfect, read on!
Tips for a Great Shot
With Flat lay photography dominating the market, brands are always looking for ways and means to make their images stand out and create an appeal. Read on to learn about some thoughtful tips on how to take good flat lay images with your mobile phone and become masters at it.
Assemble the Right Props
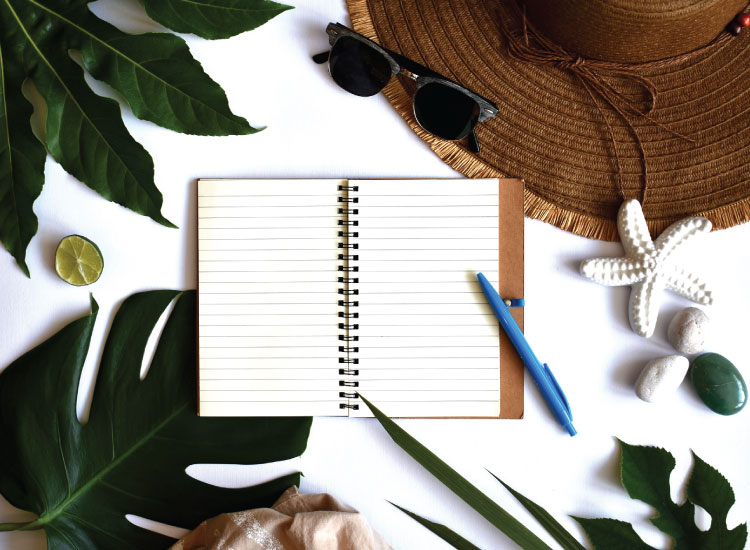
If you are looking at flat lay photography for a long term then it is best to have a bag of simple props at your disposal. These can include different styles mugs, wax candles, notebook, pens, paper weight, and vases to name a few. Look for pretty little things that will effortlessly add beauty to your image and keep them handy.
Craft a theme
When posting on your blog or social media, consistency plays its part. Try to create a theme by introducing 3-4 primary colors in your flat lay photograph and sticking to it. This will give a themed, recognisable effect to all your photographs and make your profile visually stunning. You could also achieve this by using similar backgrounds for your image like using marble countertops every time or using one particular kind of wooden floor to take pictures.
Avail Natural Light
While taking photographs with a smartphone, the best advice is using natural light. Place your objects in a brightly lit room and then process. And if you don’t a well-lit space, go outside to save regrets later. Good lighting can take your photograph from good to amazing. It creates a dimension to the picture, with natural illumination and natural shadows, adding realistic touch from the start.
AIM for Balanced Frame
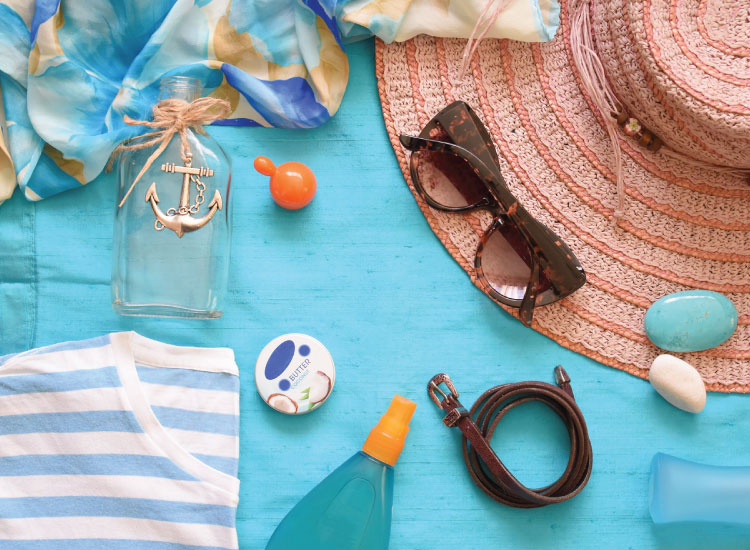
Think of your object’s weight and aim to create an actual mass balance on the frame. The mass needs to be distributed equally to all the sides of the picture to create a balanced effect like this.
The objects are dispersed equally here to create a good balance, without cluttering them all to one side. This create a uniformity across the image without leaving empty spaces, pleasing the viewer’s eye
Create depth with distance and height
Adding depth to your image accentuates its appeal. This can be accomplished by maintaining a sense of distance while shooting. Also, try playing with your elements a little by keeping some of them flat on the surface and making other objects like laptops or mugs stand. Including height will add another level in your image producing a pro-like image.
Play with textures
Going for different textures like fur, wood, textile or different fabrics can add movement to the image. If your set up seems a little flat, try adding depth by introducing materials of different texture like keeping two three different fabrics on top of each other and then your main product on top of these. This multi-layer background will certainly make your flat lay intriguing and create an imagery. Swearing by textures usually works well in food photography.
Experiment with frames
In flat lay, it is not necessary that you place your main product in centre and surround it with props. Try taking an image with repetition order like this

Try taking shots that capture only a little part of the items lining the edge, like taking a smaller shot of a big image. This creates meaningful images and forces the viewers to imagine the space and look beyond the photograph.
Make final edits
As soon as you take a shot, you might be tempted to upload it right away. But, take our tip and edit your photos first. Editing the final images is undisputedly, one of the flat lay photography tips for creating perfect images. This needs to be done to eliminate the get rid of the little defects and make color adjustments basically. Also, your images need to have same color tone, saturation etc. to create your own specific flat lay style. If you don’t possess the knowledge, try entrusting this job with an image editing service provider to leave no stone unturned in getting that high-key image.
Seek Inspiration
In order to perfect an art, you need to observe and draw inspiration continuously. With so many blogs flaunting exemplary flat lay photography skills, you have inspirations flinging from every corner of internet. Try to imbibe different styles of flat lay photography in your own brand photograph and experiment. You might not get a hang of it in the beginning but follow the trend-setters and experts to see what makes their photograph stand apart to draw out-of-the-box ideas.
The DONTs of Flat Lay Photography
Flay lay photography comes with its own set of challenges and problem areas and knowing these mistakes beforehand will ensure that you don’t make one. Listed below are things that you should NOT DO in order to keep your photograph professional and aesthetically appealing.
- Don’t let the secondary props steal the show. Placement plays a huge role in flat lay images and if you do not perfect this, your product is not going to be the focal point of your photograph.
- Don’t include too many objects in the frame. Adding too many elements will draw attention to the wrong products, leaving the viewers/customers confused about the intention or aim of your photograph.
- Don’t eliminate shadows completely. While editing flat lay pictures, some people tend to just get rid of shadows to achieve a clean look which is a blunder. Shadows add depth to an image, adding essence and keeping it real.
- Don’t go for too many colors. It is best to stick to one color palette and avoid using any strikingly bold or too bright objects to avoid any distractions in the photograph. Go by this while editing your image to keep a consistent brand profile.
With all the basics of flay lay photography covered, you are now ready to take on the world of product photography. Take extravagant flat lay shots with this newly garnered knowledge and make your products stand out in the competitive digital market.